Importance of Locators in Plastic Product Design and Its Types | Two way and Four way Locators
The locator pin is a rib-shaped structure which is placed on surface B, and it is used to position the child part with the parent part during the assembly. This locators are placed in multiple positions depending on the degrees of freedom that need to be arrested. The locator are mainly used for assembling the sub-parts and also they are very useful engineering feature for easy way of locating the position of the parts to be assembled.
2024-03-21

Why locators are Important?
Locators are essential in manufacturing and assembly processes for several reasons:
- Precision: Locators ensure precise alignment of components, helping to achieve accurate positioning during assembly. This is crucial for the proper functioning and aesthetics of the final product.
- Consistency: Using locators helps maintain consistency in assembly, reducing variations and ensuring that each unit is assembled in the same way. This is particularly important in mass production.
- Efficiency: Locators streamline the assembly process by providing reference points, making it easier and more efficient for workers to position and attach components. This can lead to increased productivity.
- Quality Control: The use of locators facilitates quality control by helping to detect and correct any misalignments or errors early in the assembly process, preventing defects in the final product.
- Durability: Properly aligned and assembled components, facilitated by locators, contribute to the overall durability and longevity of the product.
In the context of plastic door trim or similar components, locators play a crucial role in ensuring that the various parts are aligned correctly, leading to a well-assembled and functional end product.
Locators are classified as:
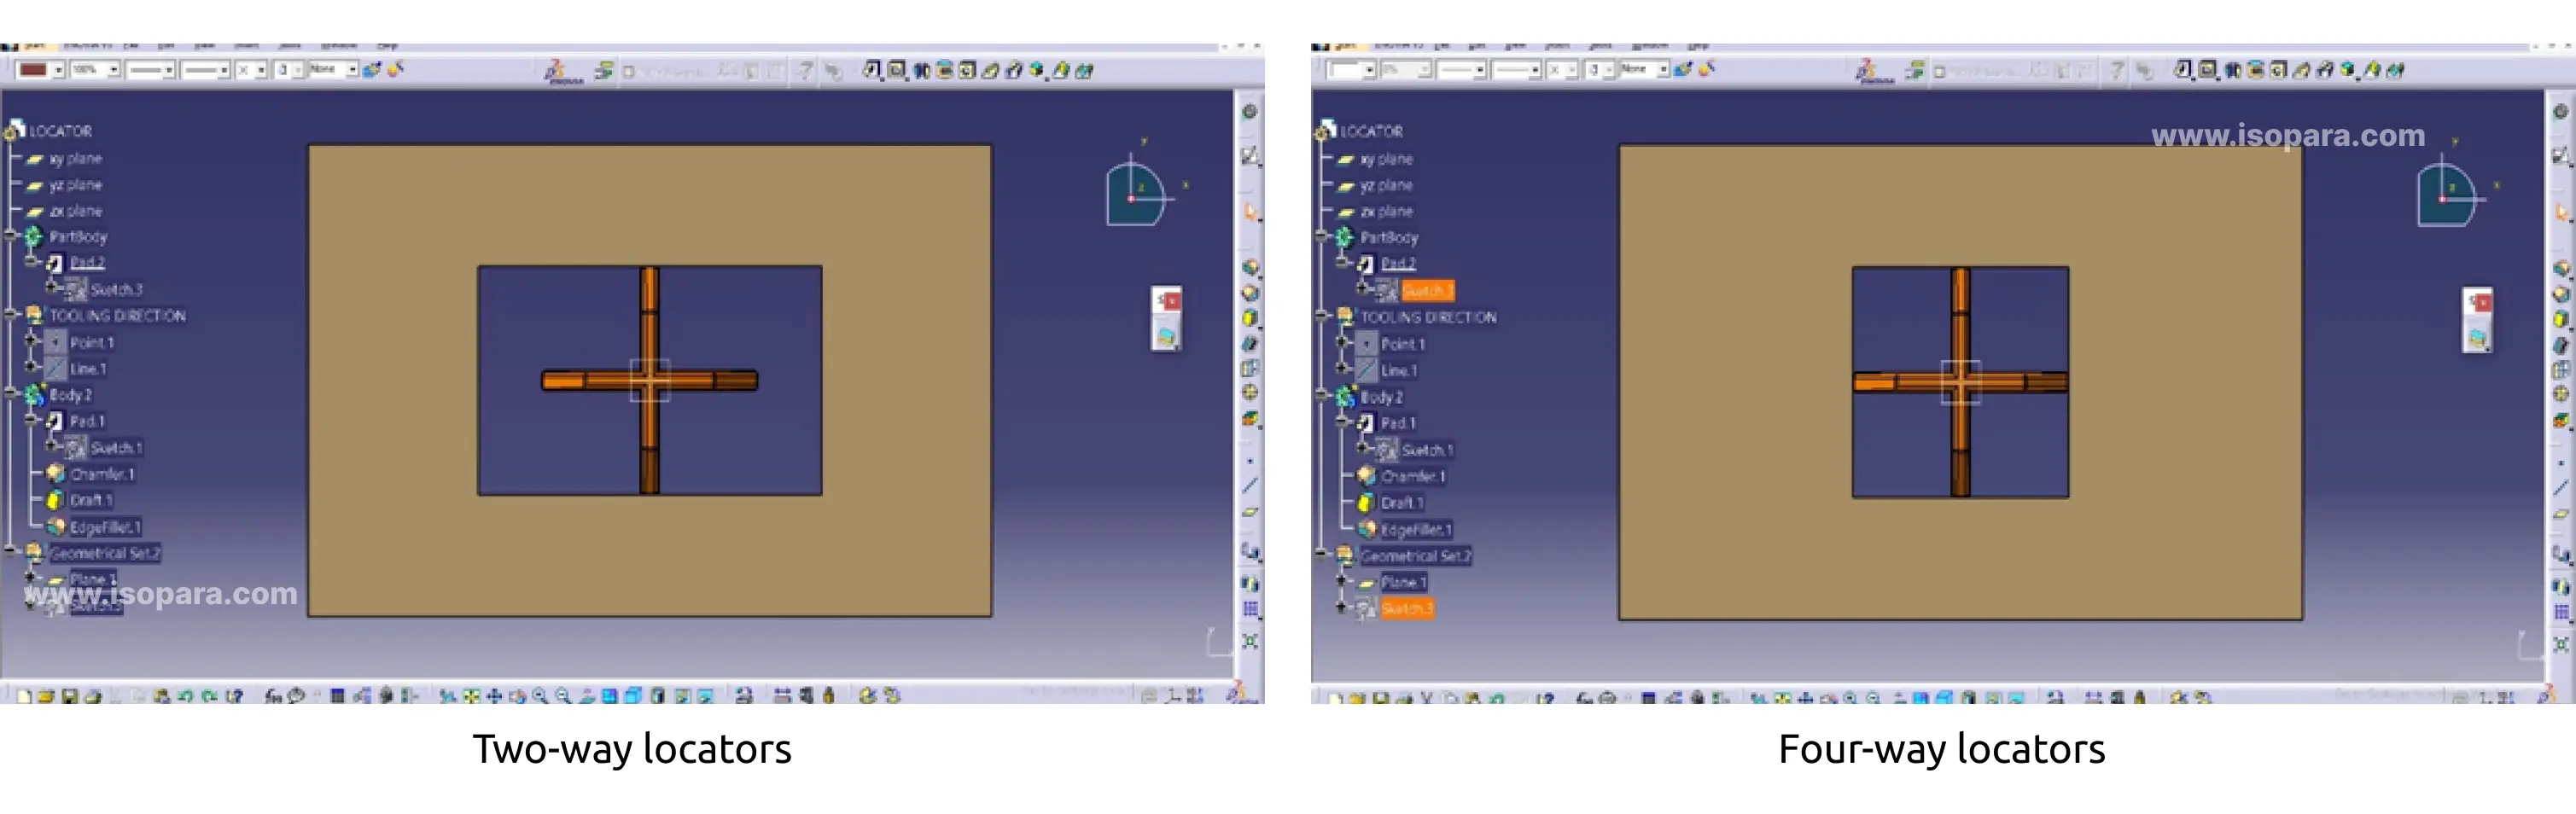
- Two-way locators: The 2-way locator pin is used to restricts the movement along 1 axis or 2 degrees of freedom.
- Four-way locator: The 4-way locator means you restricts motion along 2 axes (+X, -X, +Y and -Y) on the plane. Usually, we have cylindrical pin on the fixture and circular hole at the part. A round locating pin located in a hole is a common application of a 4-way locator, and it helps to secure the part.
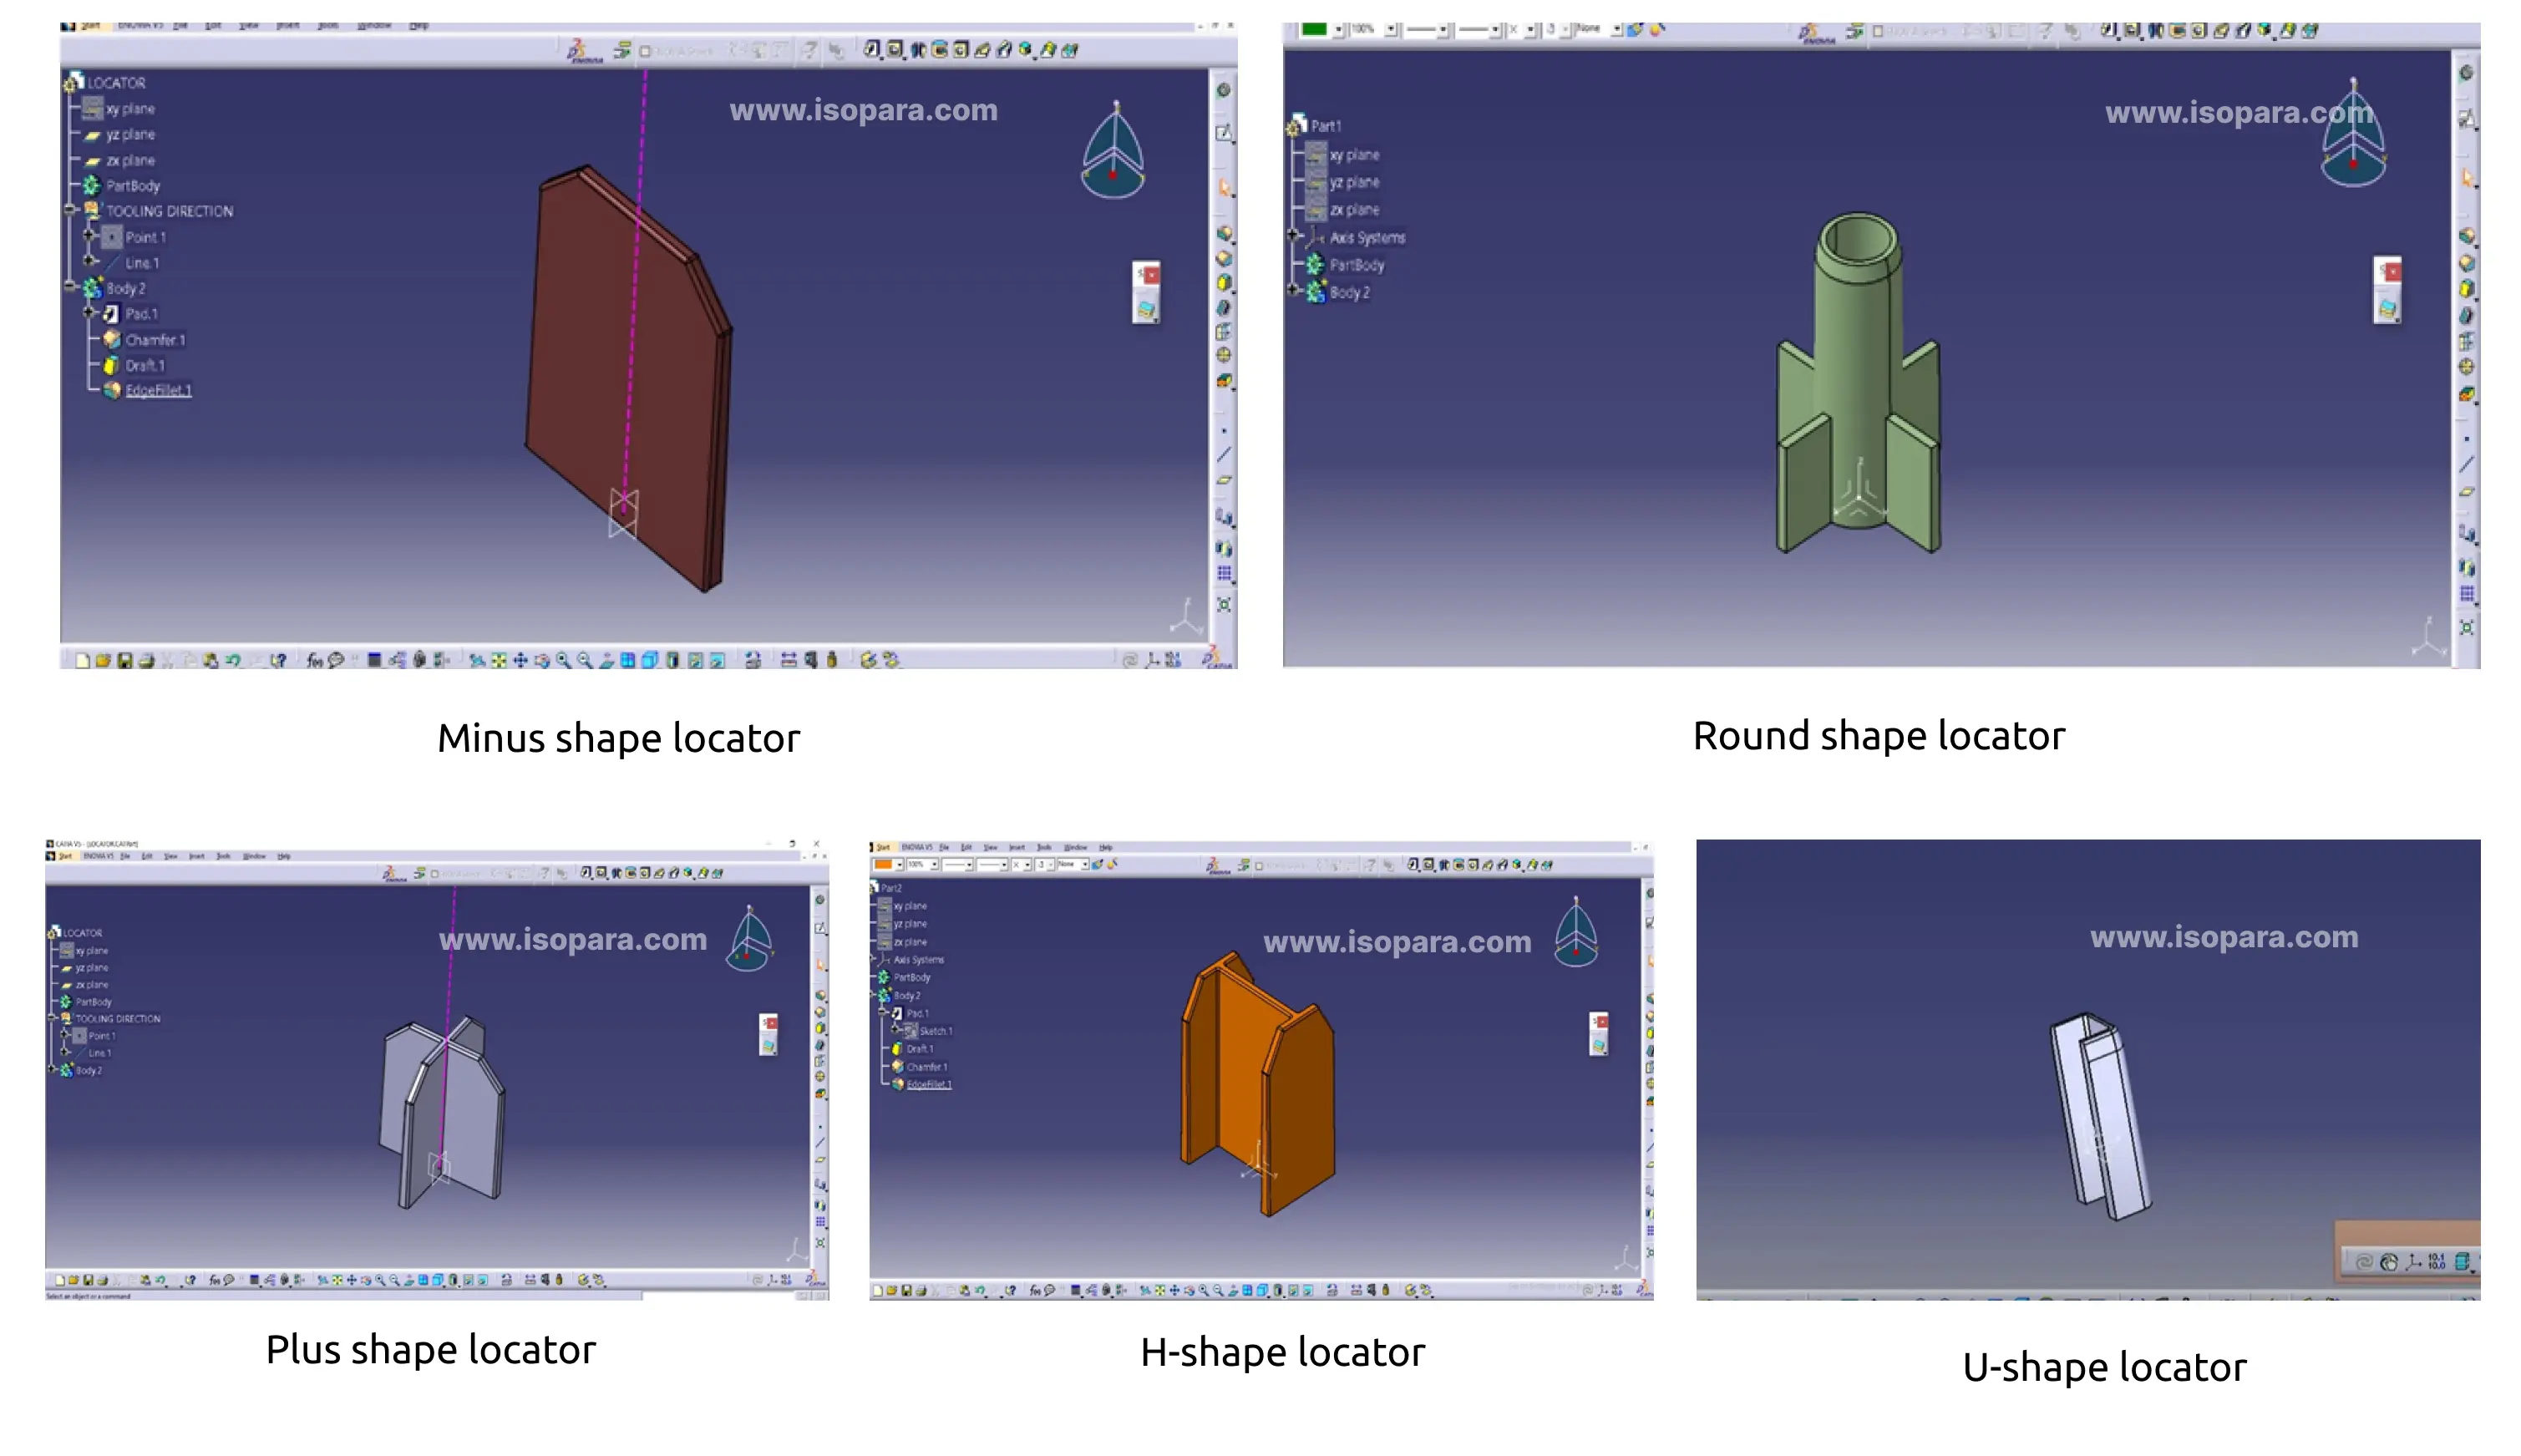
Various shapes of locators: Minus shape locator, Round shape locator, U-shape locator, Plus shape locator, and H-shape locator.
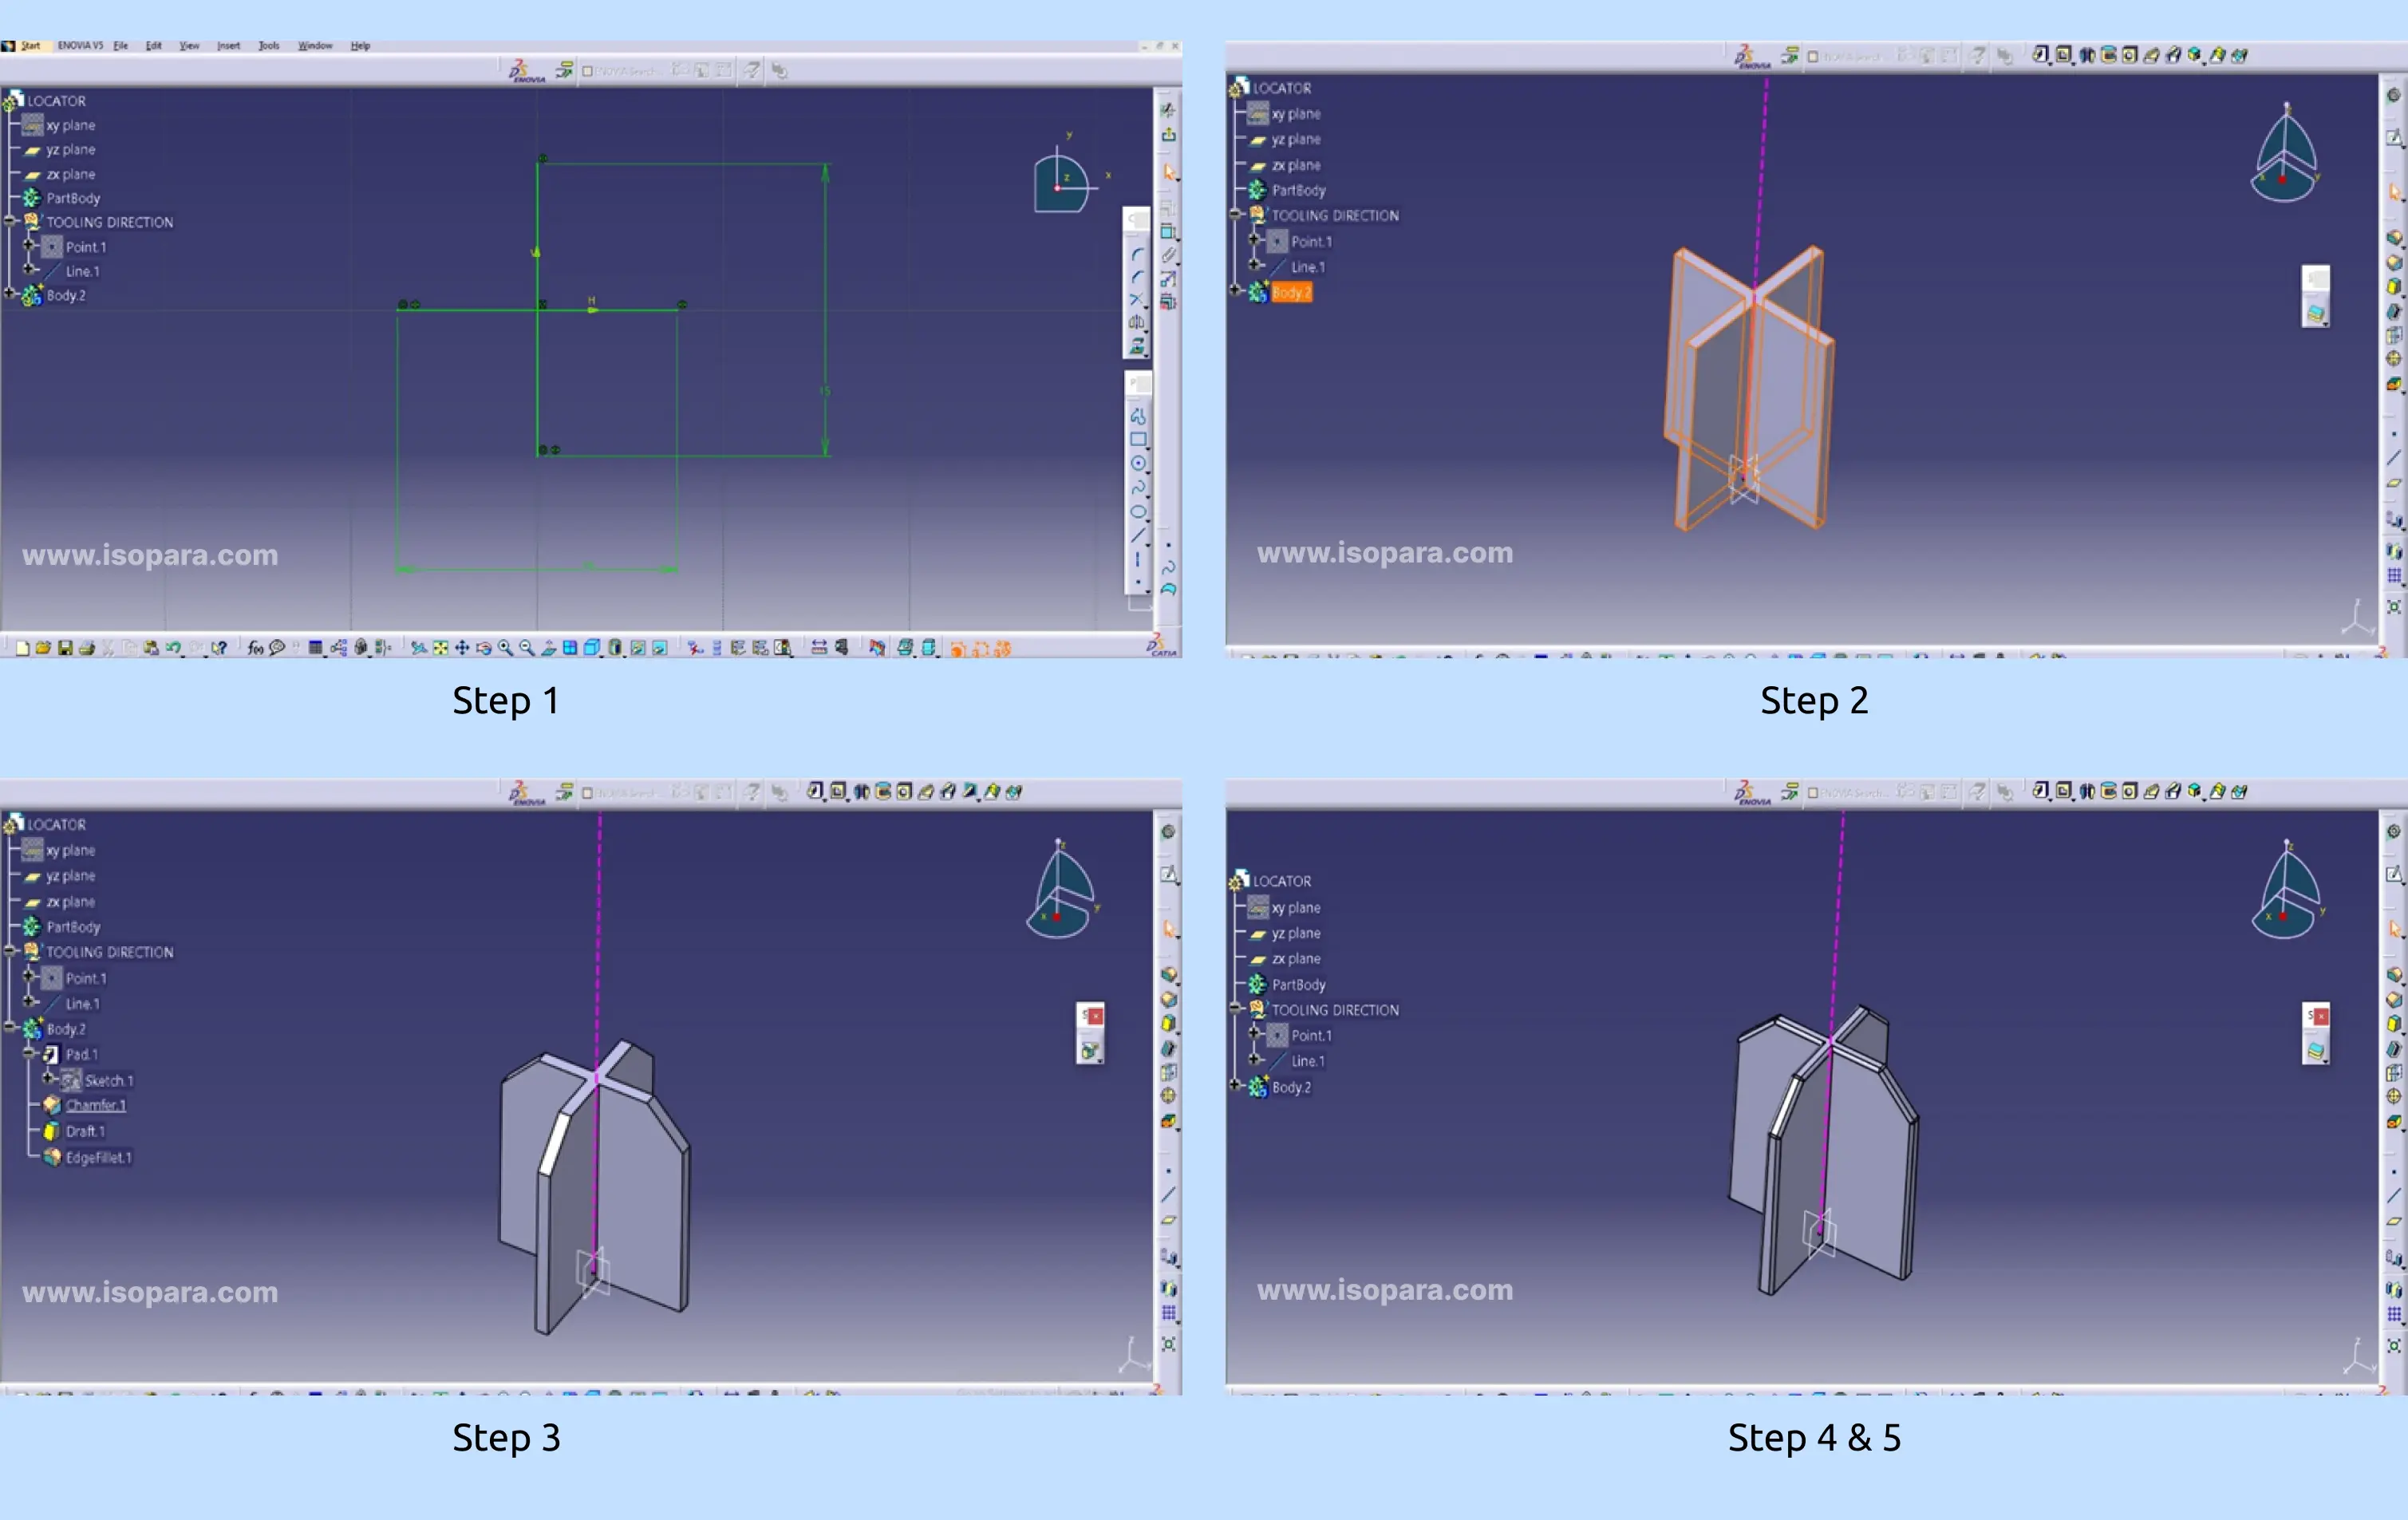
Design procedure of locator:
Below, I have created a locator design and explain about the design procedure.
Step 1: Firstly, create one positioned sketch of locator and also make it ISO-constrained.
Step 2: Then pad the sketch along the tooling direction or axis.
Step 3: After that create a chamfer of 3mm at 45 degree angle on the face to enter the locator easily into the hole.
Step 4: Give the draft angle of 0.5 degree to all the faces.
Step 5: Give the edge fillet of 0.25mm to all the edges.
Author

Shreyash Khambalkar ( Design Engineer)
Total 1 Blogs viewAs a design engineer specializing in plastic automotive product design and proficiently utilizing Isopara, I thrive in the dynamic realm of engineering innovation. With a keen eye for precision and efficiency, I harness Isopara's intuitive features to craft intricate designs that meet the stringent demands of the automotive industry. My expertise extends to leveraging Isopara's capabilities within CATIA V5, enabling me to seamlessly integrate innovative solutions into the design process.
Author’s journey so far:
I recommend everyone to go for ISOPARA for Automotive Design Training.
Course done and recommended by Author:
Share This Page


Other Trending Videos
- 3-Steps || Choose the Right CAD Software with the Right Domain
- Roadmap || Become an Automotive Design Engineer in BIW Domain.
- Roadmap || Become an Automotive Design Engineer in Plastic Domain
- Not Getting Interview CALLS? || Career Guidance
- Mechanical Design Jobs || Domain Skill
- Why CAD and its Importance? || By Experts
- Difference || CAD Engineer Vs Design Engineer
- Best CAD Software to Learn & Build a Career || By Experts
- Best CAD Software to Learn || Most Demanded by Industries
- How to Become a Design Engineer? || By Expert.